skip to main | skip to sidebar

Dream Softwares

Latest free software, World best free software download site, Earn money, Download latest softwares for free

Pages

  • Home
  • Downloader
  • Browsers

Saturday, 17 November 2012

Back stage View of Excel 2010


Introducing the Back stage View:

New to Office 2010 applications is the introduction of a Back stage view of the documents you are working with. The Backstage view is a collection of the commands you use to open a new or existing document. You will also find the commands you might use as you are exiting a document. For instance, commands related to saving, printing, protecting, versioning, and storing properties about your document. None of these commands affect the appearance of the document and affect the whole file, not just a portion of the file. To access Excel’s Back stage view, choose the File tab on the Ribbon. Let’s take a look at some of the things you can do from this new view.


Info tab:

Illustrated in Figure 1-8, the Info tab can be used to establish security options for the file, like requiring a password to open the file, or protecting the file from changes to the formatting. You can also record data about your files.


Recent tab:

This tab displays a list of the last 20 documents that were opened in Excel 2010.

New tab:

Open a new blank spreadsheet, or create a new file based on one of the dozens of templates provided with Excel. Excel gives all new workbooks a default file name (Book1, Book2, and so on) until you replace it.

Print tab:

Change the page layout, attach headers and footers, select a printer, and specify exactly what you want Excel to print from this tab. You’ll learn more about these options in Chapter 10, “Printing and Other Output Formats.”

Save & Send tab:

With the Save & Send tab, you can either send your file as an e-mail attachment, create a PDF version of the file, or save it online, where others can view it with one of the new Office Web applications. You can read more about this tab later in this chapter.


Help tab:

From this tab, you can access simple solutions to common questions, as well as get information about product support, and links to contact Microsoft directly with your questions or suggestions about Excel. If you are new to Excel, the Getting Started button offers a variety of online tutorials and additional training to accelerate your learning curve. The Options button opens the Excel Options dialog box.


Each worksheet in Excel has more than 17 billion individual cells. Luckily, Excel offers several methods using your mouse, your keyboard, and even the Ribbon for moving around them all. Depending on how you use Excel, you may find that you will use all three methods.


Using the Keyboard:

Arguably the easiest, but surely the most common, way to move around an Excel worksheet is by using the keyboard. Table 1-1 displays some of the ways you can use the keyboard to move around an Excel workbook.

Keyboard short cut keys in Excel 2010:

Keystroke Movement

Arrow keys Moves one cell at a time in the direction of the arrow

·        Tab Moves one cell right
·        Shift+Tab Moves one cell left
·        Enter Moves one cell down
·        Shift+Enter Moves one cell up
·        Page Up Moves one full screen up in the current column
·        Page Down Moves one full screen down in the current column
·        Home Moves to the first cell in column A of the current row
·        Ctrl+Home Moves to first cell in the spreadsheet, cell A1
·        Ctrl+End Moves to the last cell in the spreadsheet that has any data in it
·        Alt+Page Down Moves right one screen in the current row
·        Alt+Page Up Moves left one screen in the current row
·        Ctrl+Arrow key Moves to the next adjacent cell that contains data, depending on the direction of the arrow
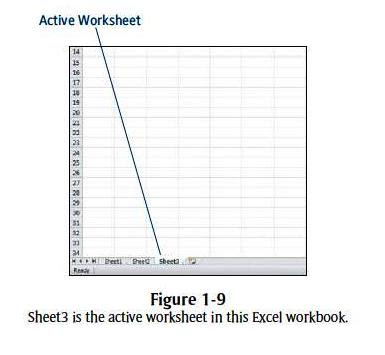
·        Ctrl+Page Down Moves to the next worksheet (see Figure 1-9)
·        Ctrl+Page Up Moves to the previous worksheet


Posted by Unknown at 10:17 0 comments Email This BlogThis! Share to X Share to Facebook
Labels: Back stage view of Excel 2010

Friday, 16 November 2012

Introduction Microsoft Excel 2010


Introduction Excel 2010:

Open Excel:

To open Excel, choose Start > All Programs > Microsoft Office > Microsoft Excel 2010. When you launch Excel, the application opens a blank document, called a workbook, as illustrated in Figure 1-1. With all of the visual stimuli found in the number of buttons, cons, rows, and columns, even a blank Excel document might appear overwhelming, but take a few minutes to familiarize yourself with all of these elements and you’ll be ready to begin entering your own data.

Figure A spreadsheet program is a software application that organizes your data into horizontal rows and vertical columns. That portion of Excel is called the worksheet area. Rows are numbered and columns are identified by letters. Above the worksheet area, the Ribbon is a collection of  the commands you will use within Excel.


Apart from the Ribbon, which will be discussed later in this chapter, you will need to be ware of several other elements (see Figure 1-2).

·        Title bar: At the top of the application you see a title bar that shows the application name and the file name.
·        Active cell: The currently selected cell is called the active cell. The active cell has a thick border around it.
·        Name box: Shows the cell address, or name, of the active cell. You can use the range name feature to customize this name. (See “Working with Range Names” later in this chapter.)
·        Insert Function button: Opens the Insert Function dialog box. (See Chapter 3, Using Excel Functions.”)
·        Formula bar: Displays the contents of the active cell.
·        Scroll bars: Excel worksheets have both horizontal and vertical scroll bars.
·        Sheet tabs: A new Excel Workbook opens with three worksheets. You can delete unneeded worksheets, or add extra worksheets to suit your needs.


·        Status bar: At the bottom of the Excel screen is the status bar that provides
feedback to you of the current state of your worksheet. The status bar will indicate if the worksheet is ready for data entry, busy calculating, or has identified an error.

Zeroing in on the Ribbon:

First introduced in Microsoft Office 2007, the Ribbon (see Figure 1-3) is common  to all Microsoft Office applications. It visually displays all of the most commonly used options needed to perform a particular task. The Ribbon groups these  command buttons under functional tabs.

·        Excel program icon: Clicking on the program icon in the upper-left corner of  Excel displays a menu with options for minimizing and closing the application.

·        Quick Access Toolbar: The Quick Access Toolbar provides access to basic file  functions. By default, those functions are Save, Undo, and Redo.  However, as demonstrated in Figure 1-4, you can click the Customize  Quick Access Toolbar arrow and choose More Commands from the drop-down menu to add the commands that you use most frequently.


Minimize the Ribbon button:

Click the Minimize the Ribbon button to remove all but the Tabs from the Ribbon, as shown in Figure 1-5. When the Ribbon is minimized, this button changes to become the Expand the Ribbon button. You can temporarily expand the Ribbon by clicking any of the tabs. 


Tabs:

Excel command buttons are organized under eight tabs: File, Home, Insert, Page Layout, Formulas, Data, Review, and View. Other tabs appear only when needed. For instance, the Chart Tools tab appears only after you have selected a chart in Excel. Clicking different tabs changes the command options visible on the Ribbon.

Groups:

Each of the tabs is divided into several collections of related tasks. These collections are called groups.

Dialog Box Launcher:

Some of the groups on the Ribbon include a small arrow icon in the bottom-right corner of the group. This icon is called the Dialog Box Launcher, and clicking it opens a dialog box to refine how the command is applied to your file. Figure 1-6 shows the Insert Chart dialog box launched from the Charts group on the Insert tab.


Galleries:

A Gallery is most often a collection of related formatting options. For instance, in Figure 1-7, clicking the down arrow next to the Themes command button on the Page Layout tab displays a preview of all themes that can be applied to your document. Make a selection from the gallery or click the arrow again to close the gallery. 


Posted by Unknown at 10:11 0 comments Email This BlogThis! Share to X Share to Facebook
Labels: Introduction to Excel
Newer Posts Older Posts Home

Labels

Blog Archive

  • ►  2016 (3)
    • ►  October (2)
    • ►  January (1)
  • ►  2014 (1)
    • ►  November (1)
  • ▼  2012 (5)
    • ▼  November (2)
      • Back stage View of Excel 2010
      • Introduction Microsoft Excel 2010
    • ►  October (3)
  • ►  2011 (1)
    • ►  November (1)

Followers

Powered by Blogger.

Popular Posts

  • DriverEasy Professional v5.1.3.15871 + Patch & Portable
    DriverEasy Professional v5.1.3.15871 + Patch & Portable Drivereasy is an software that you may use to locate lacking drivers ...
  • Avast Premier Antivirus 2016 with Free Keys
    Avast Premier Antivirus 2016: Avast Premier Antivirus is a full PC protection suite. The application has numerous features and m...
  • Google Chrome 2012
    Software Overview License:                         Freeware Google Chrome is an open source web browser developed by Google....
  • Software Most Pouplar For Free
  • Introduction Microsoft Excel 2010
    Introduction Excel 2010: Open Excel: To open Excel, choose Start > All Programs > Microsoft Office > Microsoft Excel 201...
  • VideoLAN (VLC media player )
        Features Simple, fast and powerful media player. Plays everything: Files, Discs, Webcams, D...
  • Back stage View of Excel 2010
    Introducing the Back stage View: New to Office 2010 applications is the introduction of a Back stage view of the documents you are...
  • Mozilla Firefox Browser 2012
    Software Overview;            License:                                 Open Source Mozilla Firefox   is a   free an...
  • Opera
    Opera: Opera started out as a research project in Norway's largest telecom company, Telenor, in 1994, and branched out into an ...
  • Internet Download Manager (IDM) v 6.26 Build 8
    Internet download manager (idm) is a device to growth down load speeds through as much as five times, resume and time table download...

About Me

Unknown
View my complete profile
 
Copyright (c) 2010 Dream Softwares. Designed for Video Games
Download Christmas photos, Public Liability Insurance, Premium Themes