Introducing
the Back stage View:
New
to Office 2010 applications is the introduction of a Back stage view of the
documents you are working with. The Backstage view is a collection of the
commands you use to open a new or existing document. You will also find the
commands you might use as you are exiting a document. For instance, commands
related to saving, printing, protecting, versioning, and storing properties
about your document. None of these commands affect the appearance of the
document and affect the whole file, not just a portion of the file. To access Excel’s
Back stage view, choose the File tab on the Ribbon. Let’s take a look at some
of the things you can do from this new view.
Info tab:
Illustrated
in Figure 1-8, the Info tab can be used to establish security options for the
file, like requiring a password to open the file, or protecting the file from
changes to the formatting. You can also record data about your files.
Recent
tab:
This
tab displays a list of the last 20 documents that were opened in Excel 2010.
New tab:
Open
a new blank spreadsheet, or create a new file based on one of the dozens of
templates provided with Excel. Excel gives all new workbooks a default file
name (Book1, Book2, and so on) until you replace it.
Print tab:
Change
the page layout, attach headers and footers, select a printer, and specify
exactly what you want Excel to print from this tab. You’ll learn more about
these options in Chapter 10, “Printing and Other Output Formats.”
Save &
Send tab:
With
the Save & Send tab, you can either send your file as an e-mail attachment,
create a PDF version of the file, or save it online, where others can view it
with one of the new Office Web applications. You can read more about this tab
later in this chapter.
Help tab:
From
this tab, you can access simple solutions to common questions, as well as get
information about product support, and links to contact Microsoft directly with
your questions or suggestions about Excel. If you are new to Excel, the Getting
Started button offers a variety of online tutorials and additional training to
accelerate your learning curve. The Options button opens the Excel Options
dialog box.
Each
worksheet in Excel has more than 17 billion individual cells. Luckily, Excel
offers several methods using your mouse, your keyboard, and even the Ribbon for
moving around them all. Depending on how you use Excel, you may find that you
will use all three methods.
Using the
Keyboard:
Arguably
the easiest, but surely the most common, way to move around an Excel worksheet
is by using the keyboard. Table 1-1 displays some of the ways you can use the
keyboard to move around an Excel workbook.
Keyboard
short cut keys in Excel 2010:
Keystroke
Movement
Arrow keys Moves one cell at a time in the direction
of the arrow
·
Tab Moves one
cell right
·
Shift+Tab Moves
one cell left
·
Enter Moves one
cell down
·
Shift+Enter Moves
one cell up
·
Page Up Moves one
full screen up in the current column
·
Page Down Moves
one full screen down in the current column
·
Home Moves to the
first cell in column A of the current row
·
Ctrl+Home Moves
to first cell in the spreadsheet, cell A1
·
Ctrl+End Moves to
the last cell in the spreadsheet that has any data in it
·
Alt+Page Down
Moves right one screen in the current row
·
Alt+Page Up Moves
left one screen in the current row
·
Ctrl+Arrow key
Moves to the next adjacent cell that contains data, depending on the direction of
the arrow
·
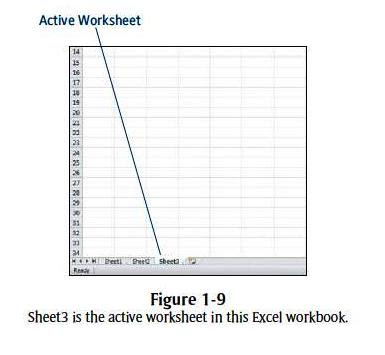
Ctrl+Page Down
Moves to the next worksheet (see Figure 1-9)
·
Ctrl+Page Up
Moves to the previous worksheet


0 comments:
Post a Comment